I designed and made a handbag this evening, as a gift for my mother-in-law’s birthday. I’ve decided to write up a tutorial of how I did it, as I really like the design and will probably experiment and make more in the future.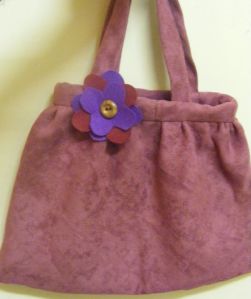
The bag is made of dusky pink suede, salvaged from a second-hand skirt. I lined it with deep purple fabric, and finished it with a felt flower and a wooden button. It measures approximately 12 inches wide by 9 inches high, although it could be made in a variety of sizes. I had a few issues with the cutting out, as the skirt I used had been cut on the bias, making it difficult to get a straight bit of fabric. I’m not the world’s best sewer, and a lot of this was trial and error, so there are probably better ways to achieve the finished result. However, the whole thing took about 4 1/2 hours to make, so quite a quick and easy project.
To make the bag, cut out two large rectangles of fabric, one in the main fabric, and one in the lining. Cut these rectangles on the fold, so that there doesn’t need to be a seam at the bottom of the bag.
Next, sew the side seams on both pieces using a backstitch. Trim the seams and press them flat to produce a neater effect.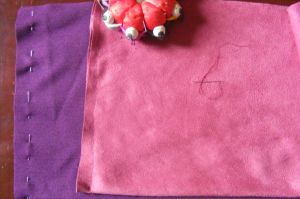
Turn the main bag piece right side out, and place the lining piece inside, so that the wrong sides are touching. Line up the corners and seams, and then pin the two pieces together around the top of the bag opening. Using a double thread for extra security, gather round the top of the opening with a running stitch. The aim is to draw in the top of the bag just enough to create the desired effect, while still leaving a sizeable top opening. Secure the gathering thread and spread out the finished gathers evenly.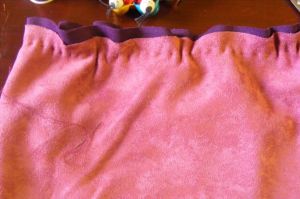
Next, cut a piece of the main fabric to use as a binding for the top of the bag. This should be long enough to go round the opening, and wide enough to edge the top of the bag for about 3/4 of an inch on both the right and wrong sides. Pin the binding in place round the top of the bag with the right sides touching, making sure that the gathering thread is covered. Seam the two ends of the binding before attaching them to the opening of the bag, so that a neat seam will be seen on the right side. Sew the binding in place with a firm backstitch.
Turn the binding to the right side, fold over a hem, and then pin the hemmed edge to the inside of the bag. Make sure that both sides of the binding are an equal depth. Sew the second side of the binding in place – I used a tiny whip stitch for this.
Your bag should now look like this – in my picture the pins are still showing, but you get the idea!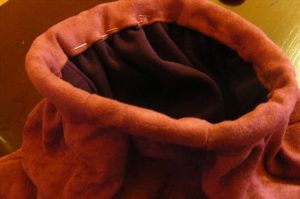
The next step is to make the handles. Cut two long strips of fabric, about 2 to 3 inches wide. Fold in half lengthways with the right sides together, and sew a seam with backstitch. Turn the handle right side out, using a knitting needle or something similar to help if necessary. Fold the raw edges inside the handle at each end, and then attach the ends to the inside of the bag. I used a whip stitch for this bit. Although I handsewed everything, you could probably sew this quite neatly on a machine, perhaps oversewing decoratively with a contrasting thread. You can see the different stages of the handles in this picture – I’m holding one handle before it’s turned the right way out, and the other handle has already been attached.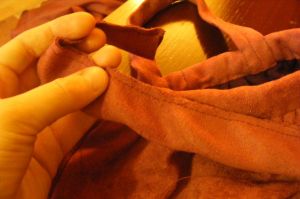
The final stage is to decorate your bag. I used a felt flower with a wooden button at the centre, and sewed it near the top of the bag. You could also add sequins, applique, flowers, buttons, ribbons – anything that suits you and your taste.

Lovely bag! Very pretty colours & really like the suede x
LikeLike
That’s a lovely bag!!
LikeLike
Thanks!
LikeLike