A couple of weeks ago, I found a link on another blog to the Hillary’s Blinds Country Craft Competition, and thought I would have a go at entering. The challenge was to choose one fabric from a selection of four, and then make something out of it, using any other materials that you might need. The four fabrics were very different, ranging from a peacock print through to painted florals. I chose the Patina Pewter, because I wanted to make something for my Mum’s birthday, and thought that the classic houndstooth check would be the perfect fabric for an elegant gift.
Unfortunately, when it arrived, it wasn’t anything like what I was expecting. From the pictures, I thought I’d be receiving a parcel of printed cotton, but the fabric was shiny and silky, and quite thick and heavy. So I rethought my plans! I decided that heavier fabric would work well as a bag, and I tried a few options, laying out different accessories and seeing what looked nice together.

I toyed with the idea of making quite a structured bag with a zipped opening and button flowers on the front, but then I decided to have a look at the rest of the fabric in my stash to get some more ideas.
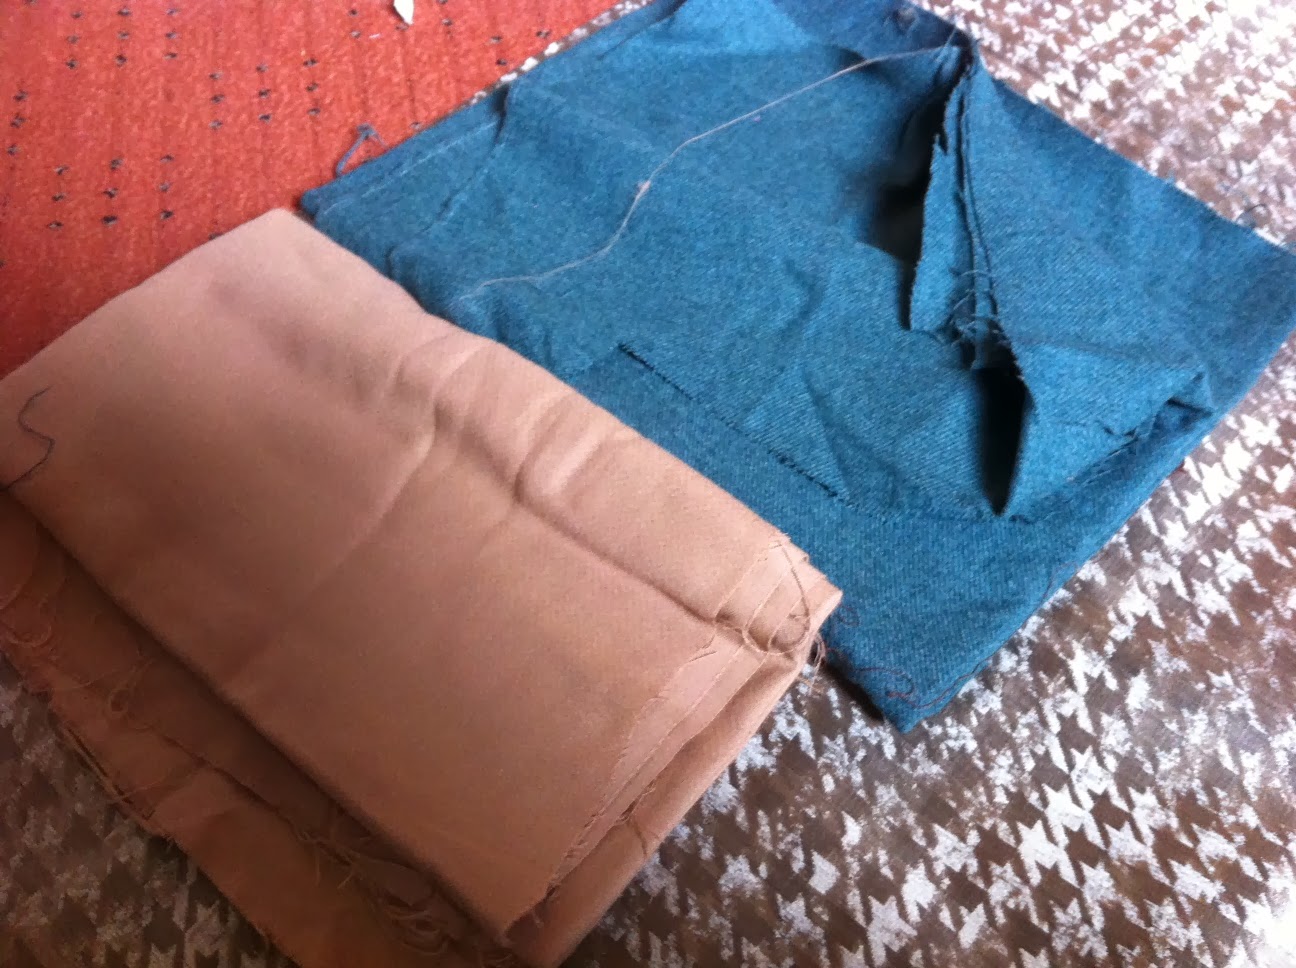
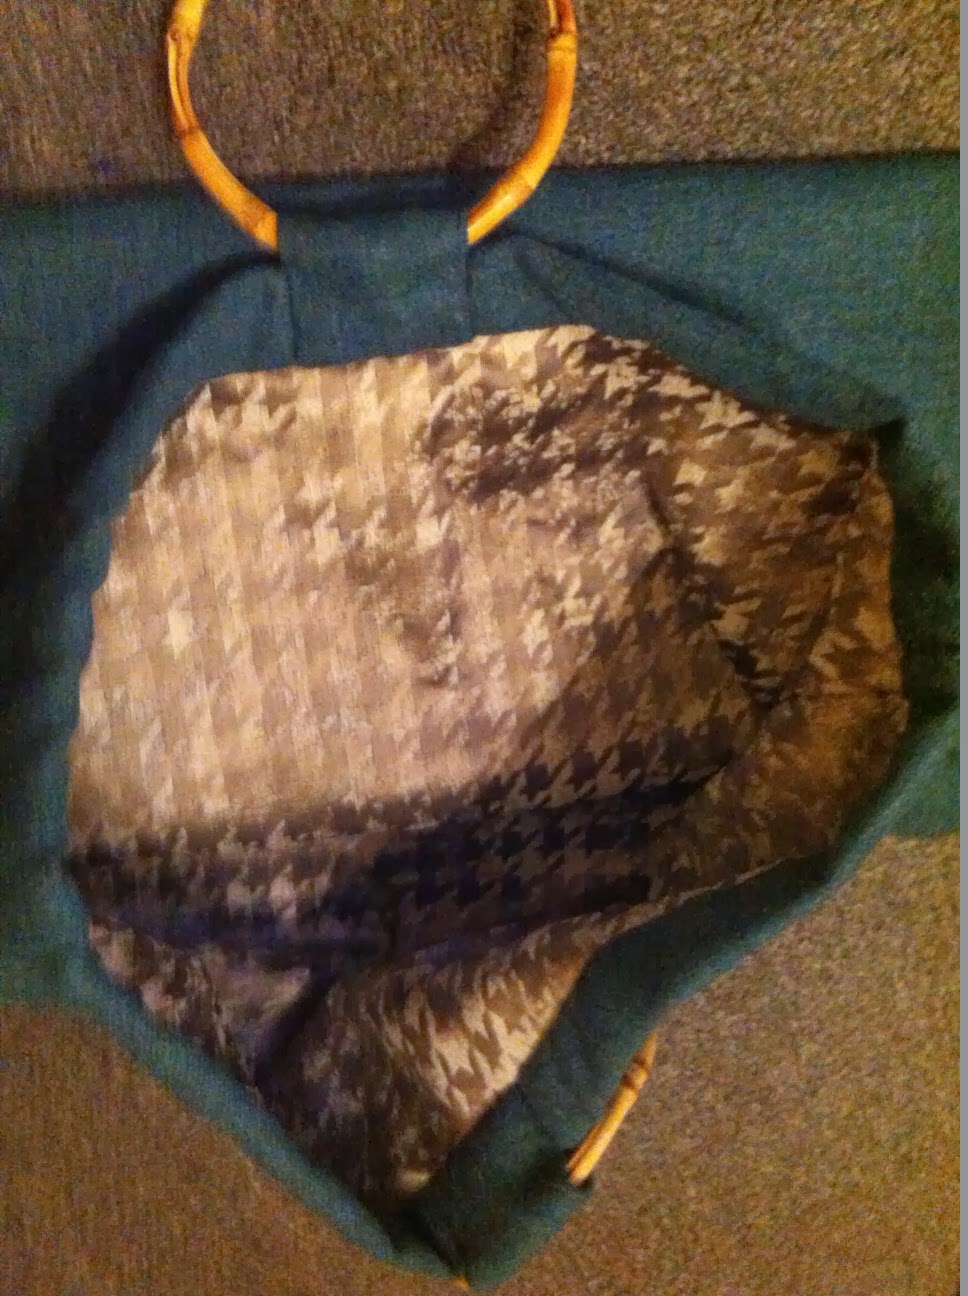
I had some green tweedy fabric, and some brown cotton, both salvaged from a charity shop for a pound, and I tried a few different ways of combining them. Eventually, I settled on the green tweed as the outside of the bag, because the fabric from Hillarys Blinds was stiff enough to make a good sturdy lining.
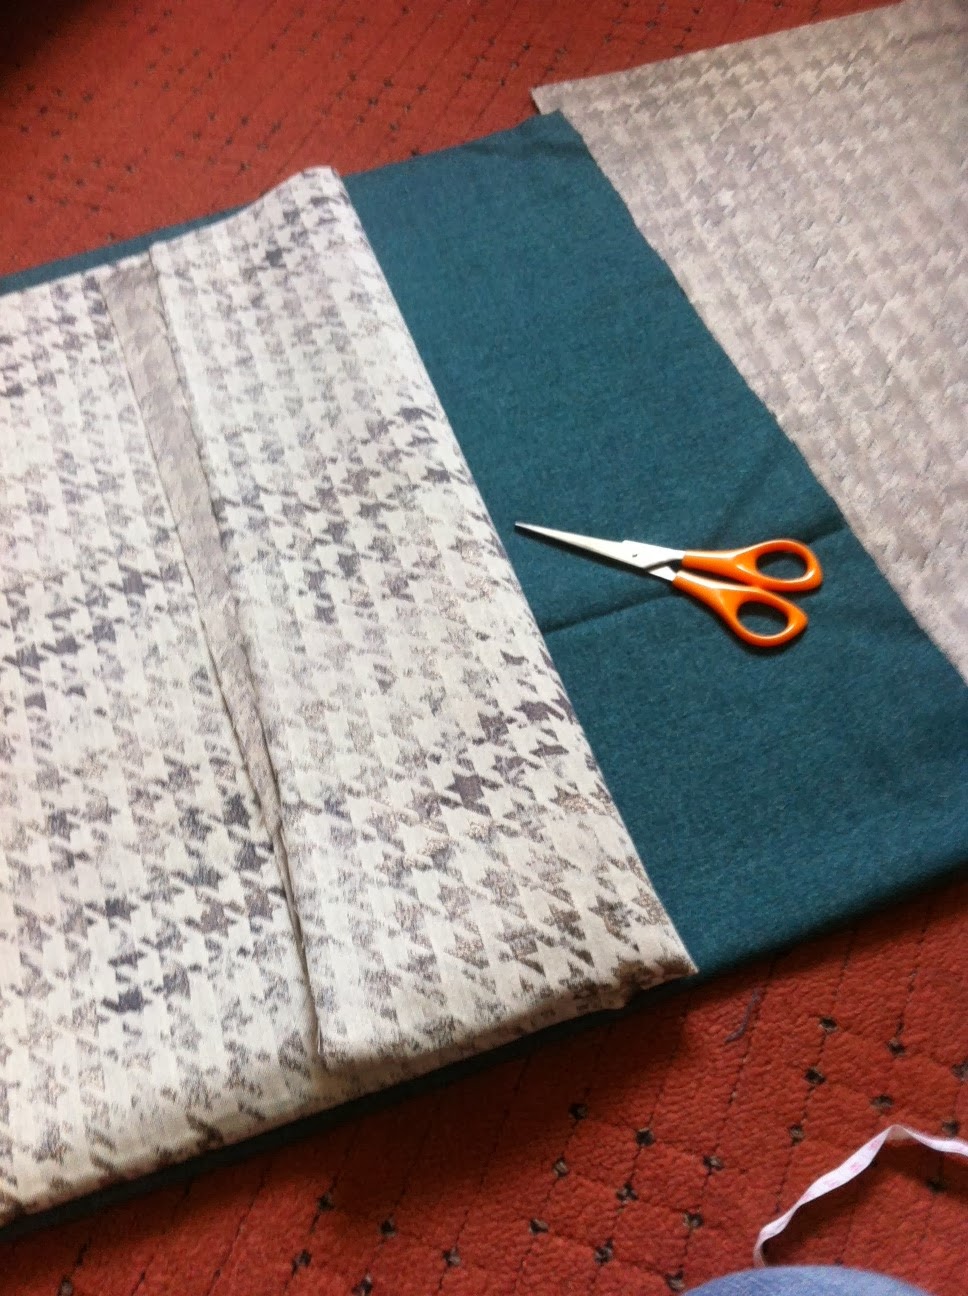
I cut out two bag shapes, with the bottom of the bag on the fold of the fabric. The lining piece was cut slightly smaller, so that it would fit inside nicely. As you might have noticed, I didn’t really measure anything, just sort of cut and hoped for the best!
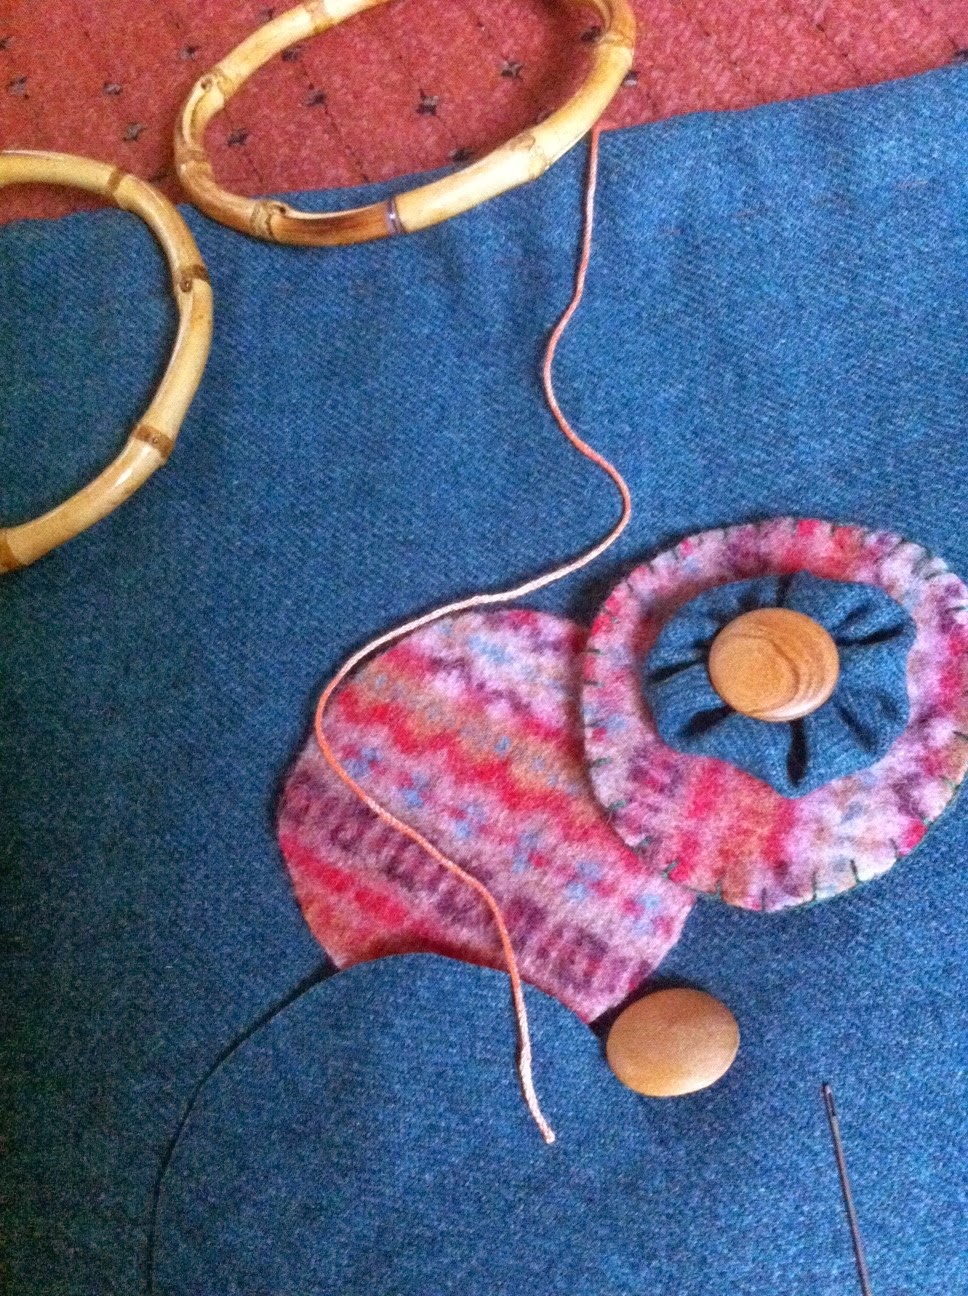
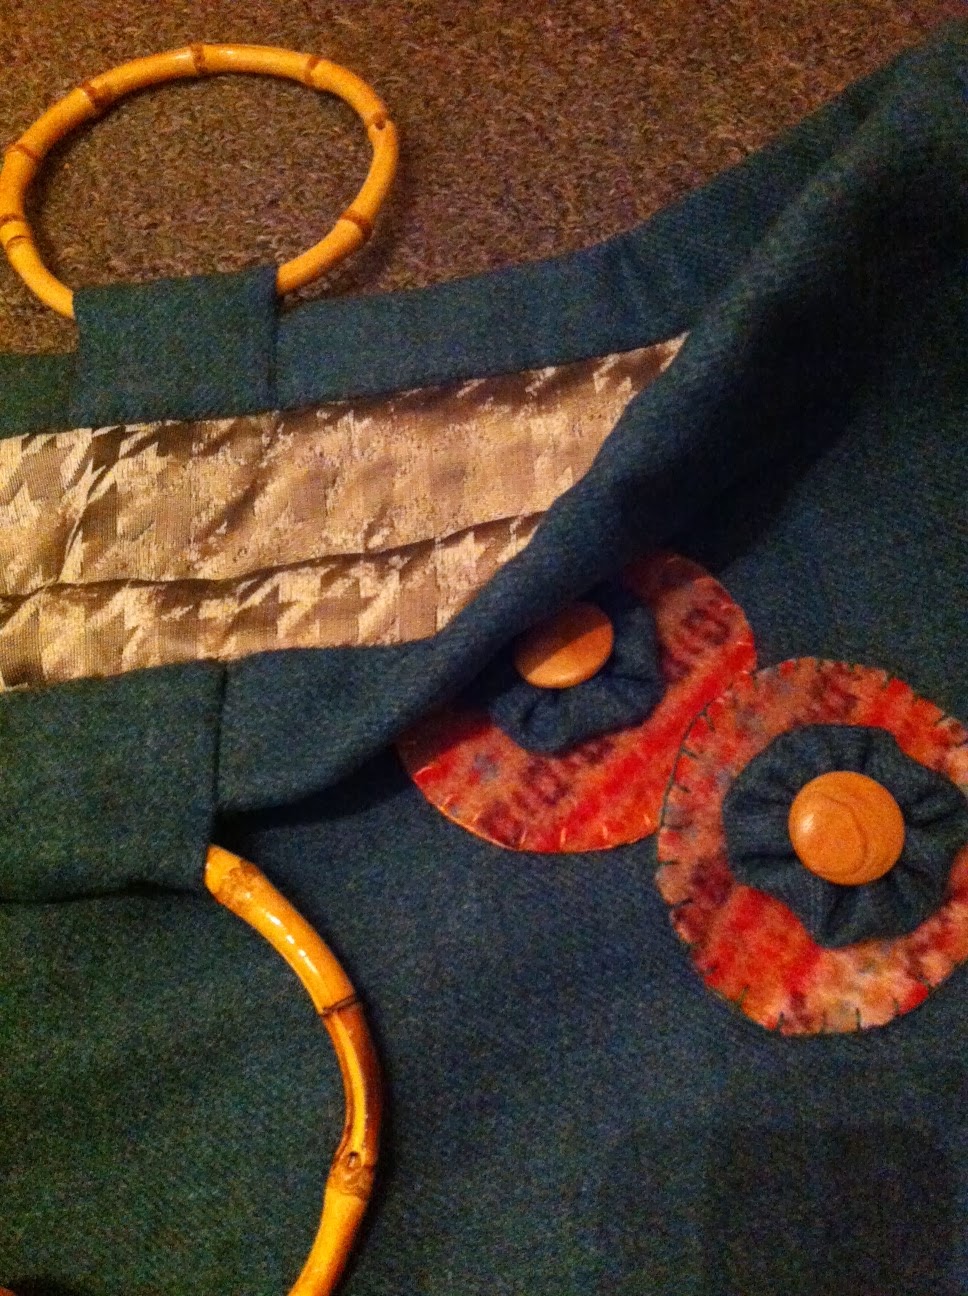
Then I took an old sweater dress that I’d accidentally felted, and cut out a circle from the fair isle yoke.
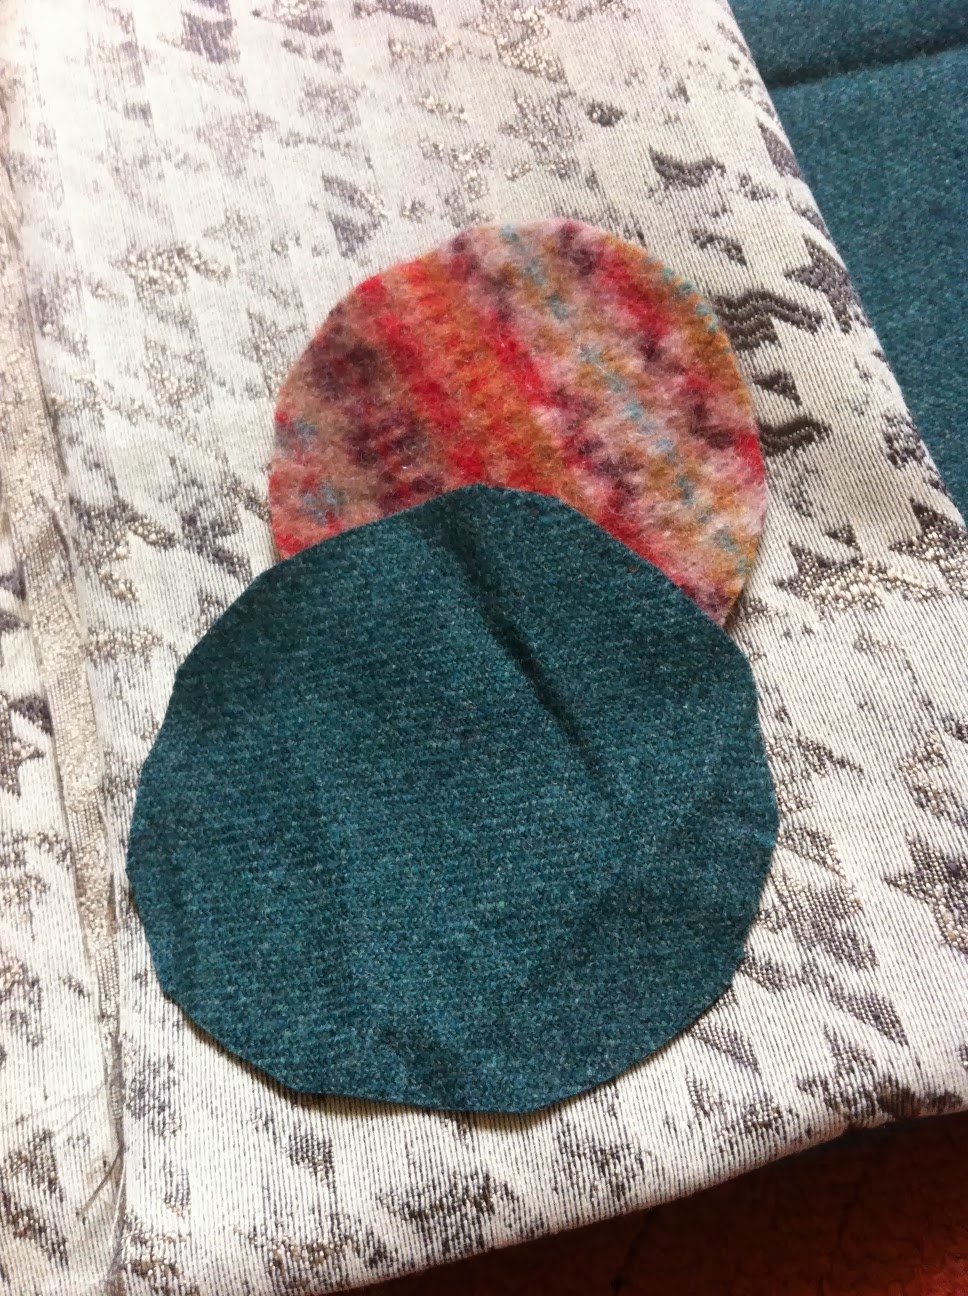
Using the green tweed, I cut out another circle, and then sewed a gathering thread round the edge to make a little yo-yo.
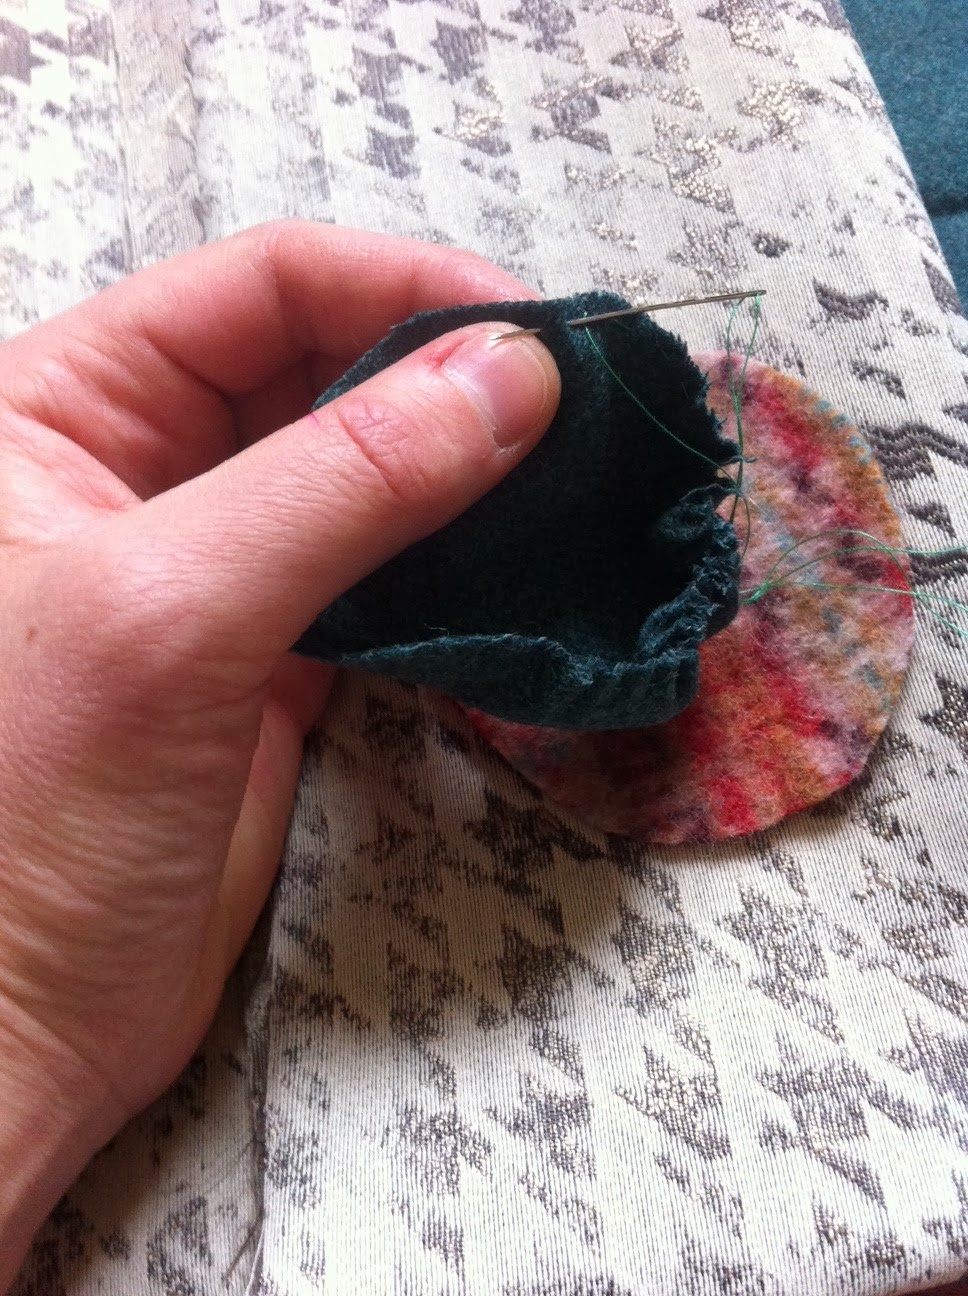
Then I stitched a wooden button into the centre of the yo-yo – another charity shop find that came in handy!

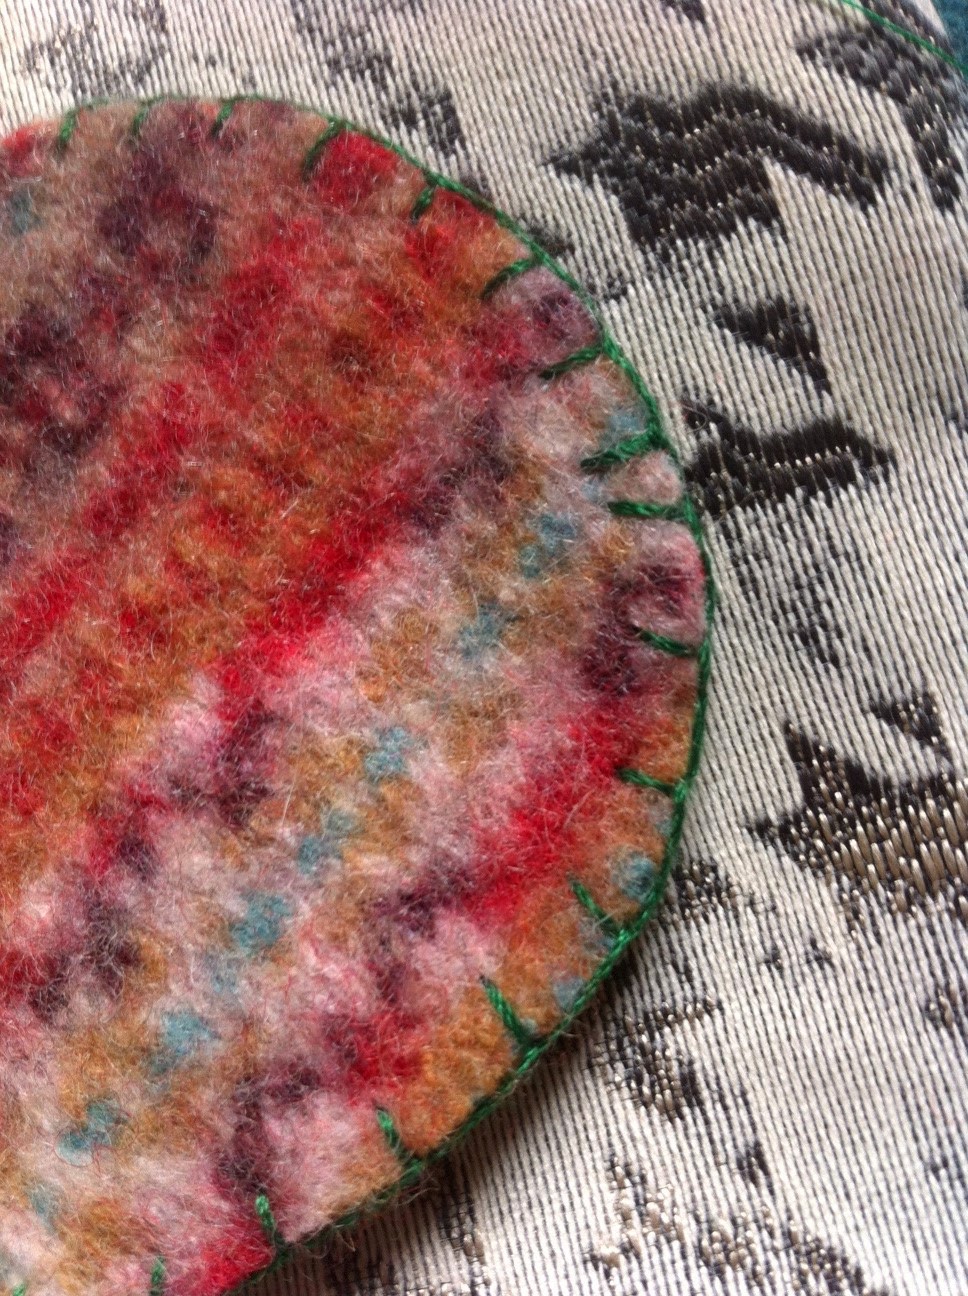
Next, I took some embroidery silk that was left over from a kit I’d made, and blanket stitched round the edges of the felt circle, just to make sure it didn’t fray.
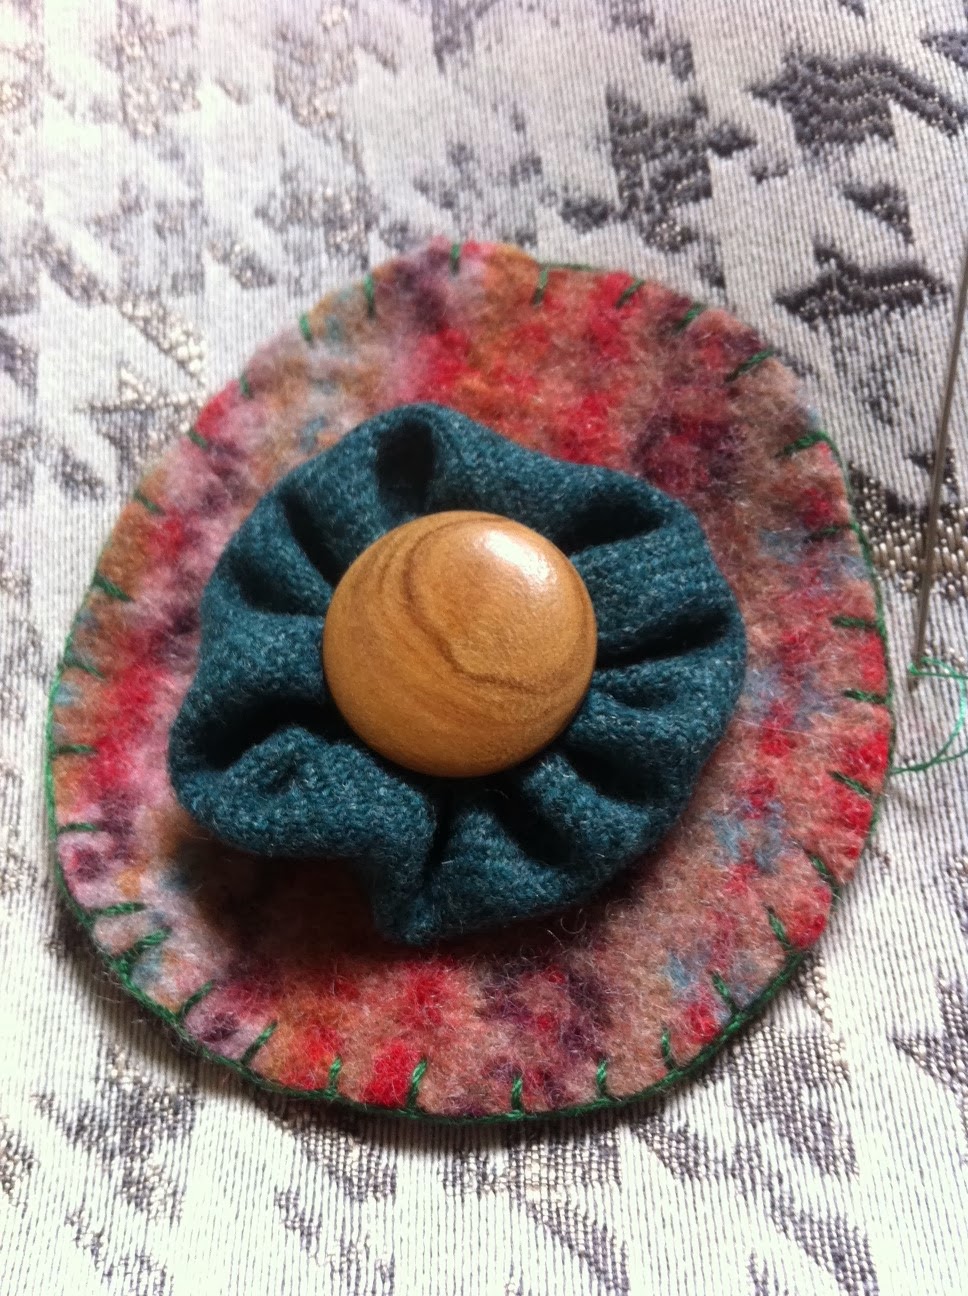
Finally, I sewed the yo-yo into the centre of the felt circle, and put it aside to sew onto the bag later.
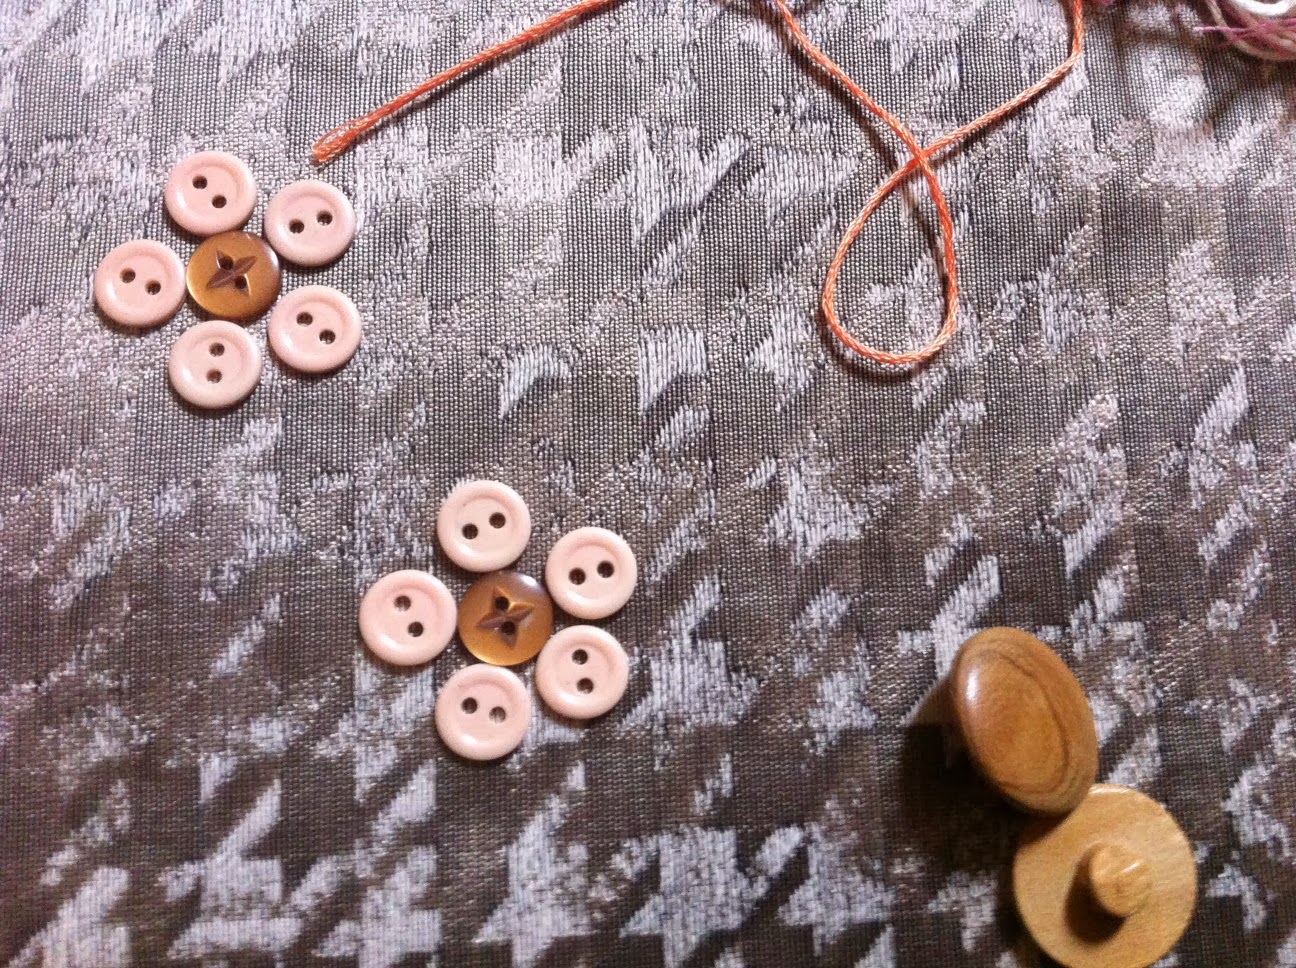
Then I pinned the lining pieces together at the sides, and backstitched the seams. This would have been a lot quicker if my sewing machine had been working, but it’s out of action at the moment, so it meant I had to do a lot of slow hand sewing! You can probably see my two assistants in the background, sorting out buttons.
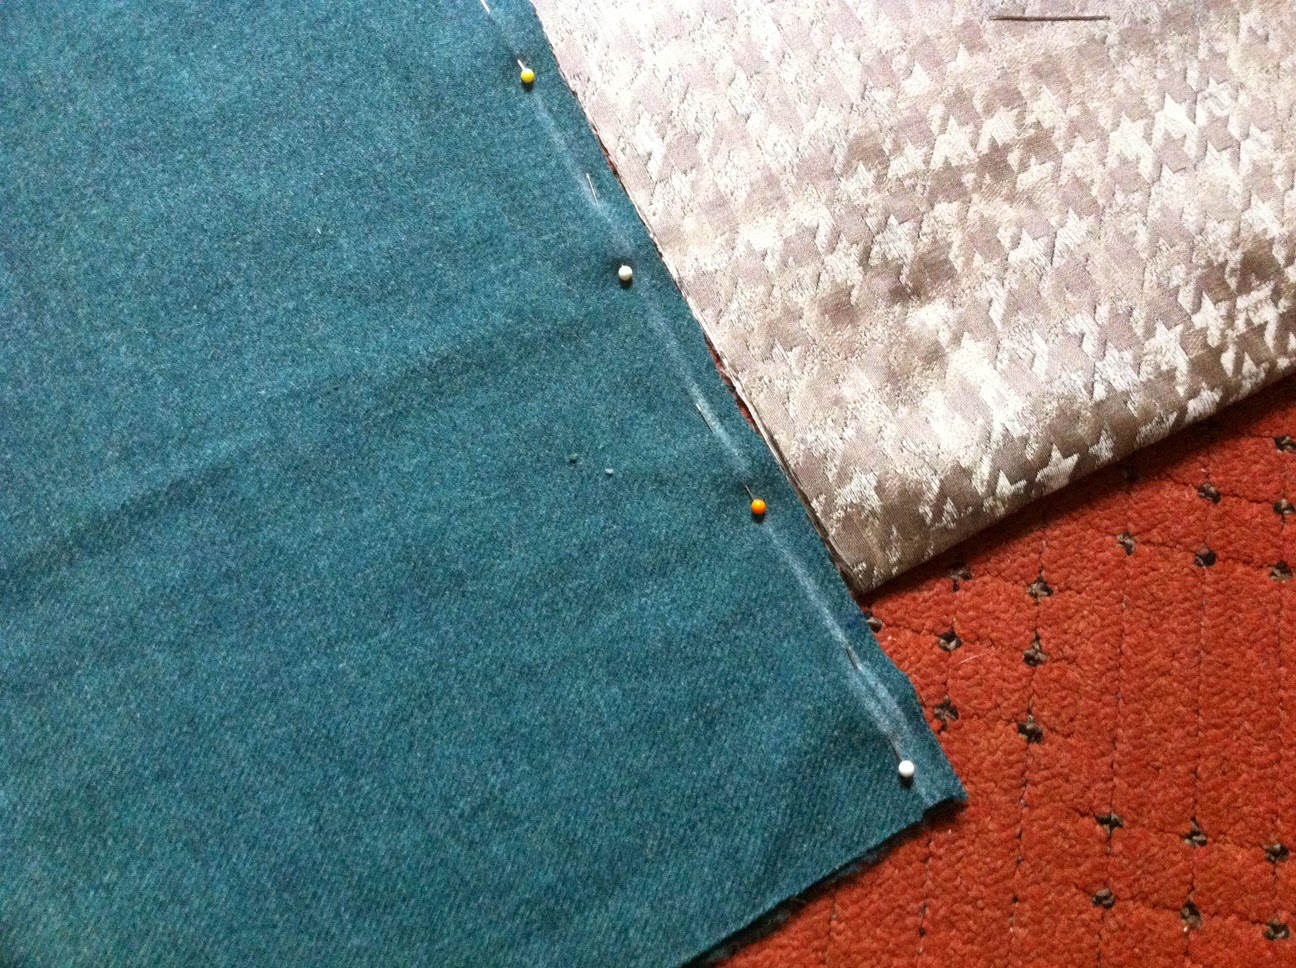
Next, I pinned the tweed part of the bag at the side seams, with the right sides of the fabric together. The white mark is my very amateur attempt at drawing a straight line with tailor’s chalk. It didn’t really help to make the edge particularly straight, but at least I tried.
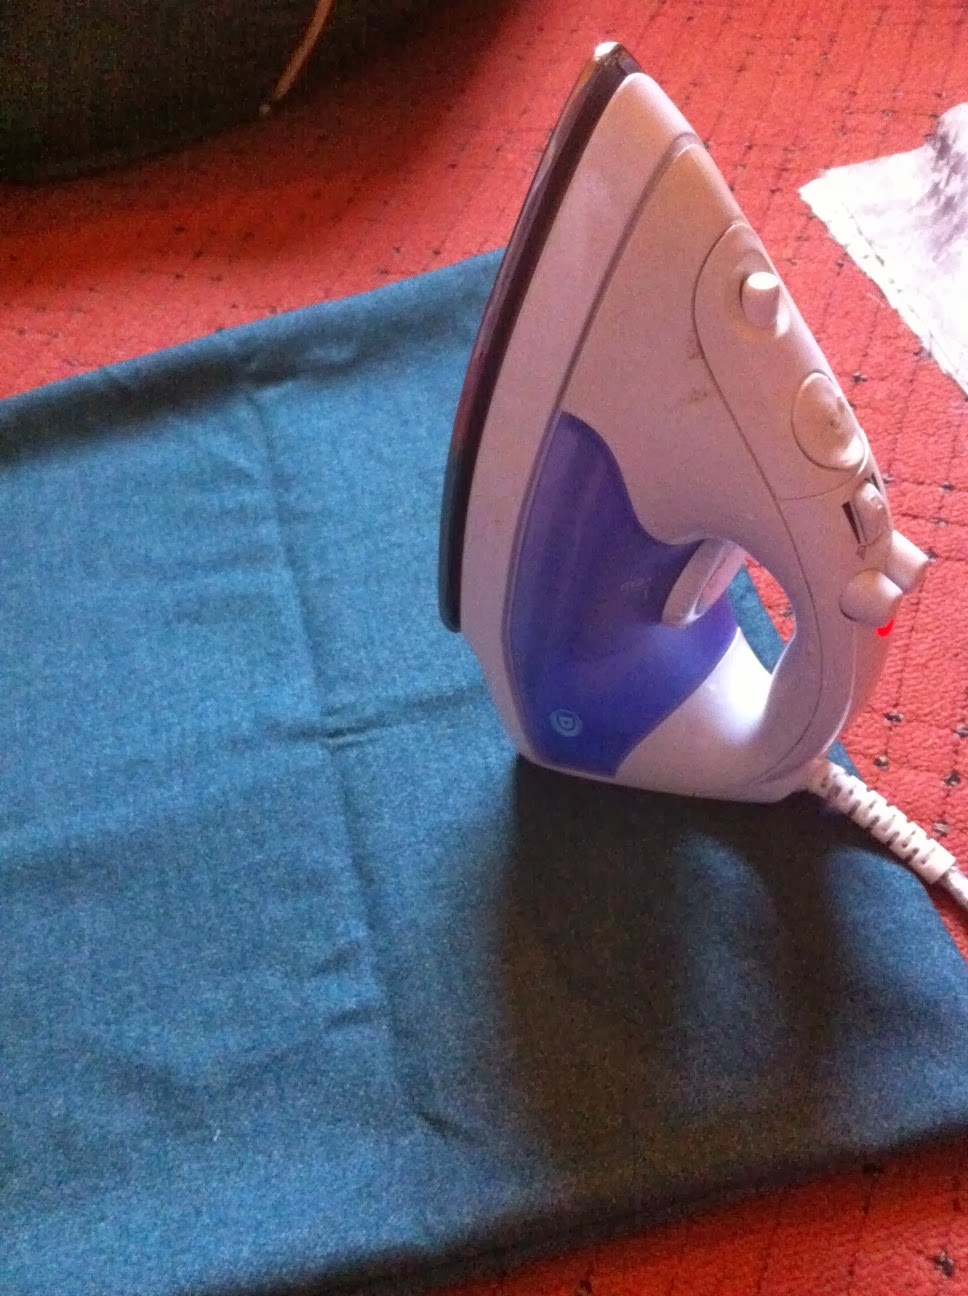
At this point, I decided to give the whole thing an iron, to make sure it looked okay when assembled.
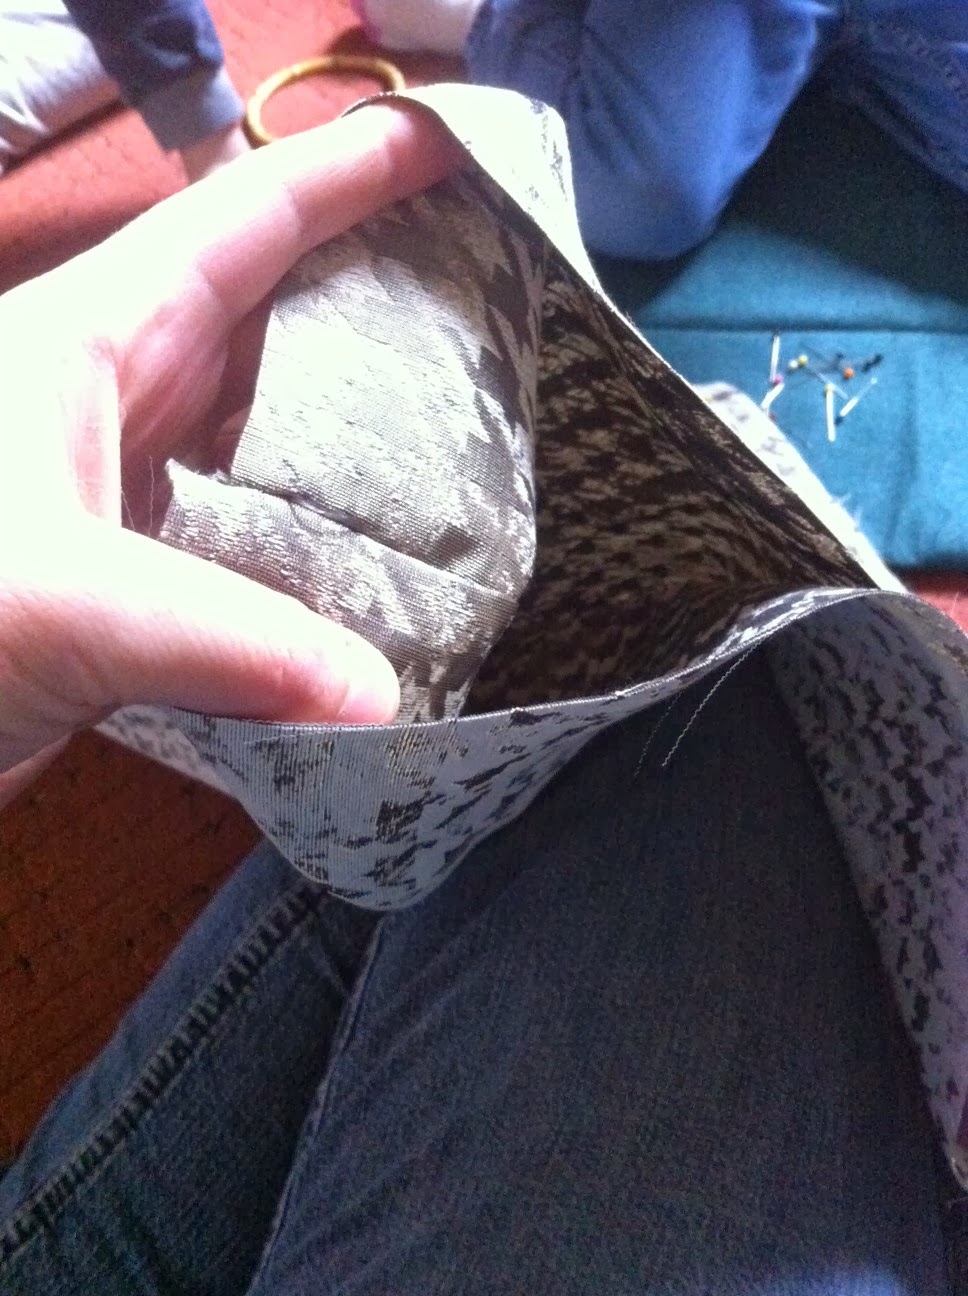
The next stage was putting the lining inside the main bag piece, and hoping it fitted – luckily it did! I pinned the two pieces together to make sure they were even all the way round.

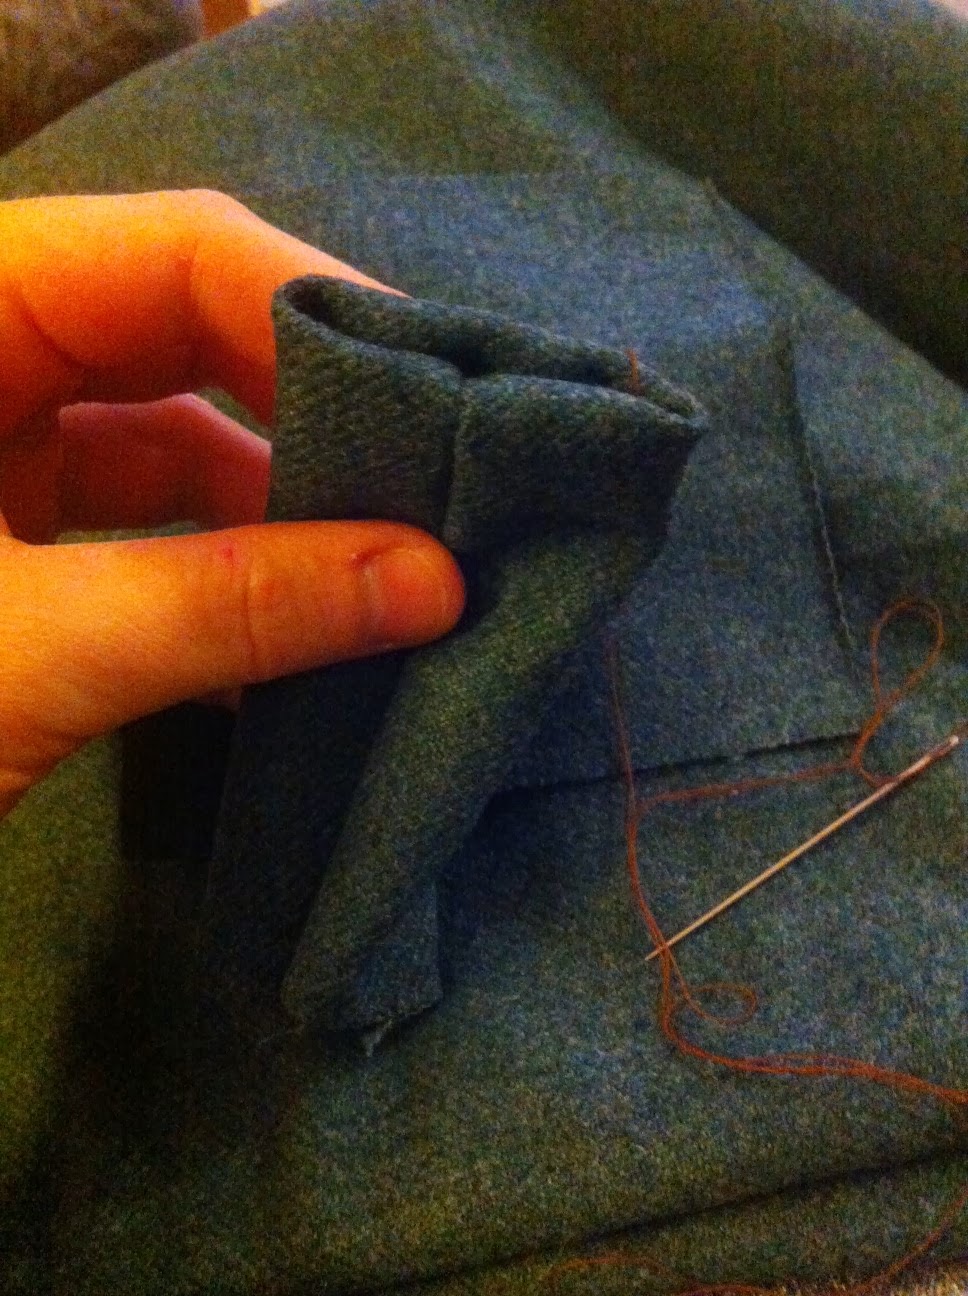
Then I folded the tweed fabric over once, with the raw edges still showing, and pinned it in place. My eventual aim was to roll this over another time, hiding the raw edges of the tweed, but I wanted to do it in stages so it stayed straight and even.

Here’s the finished edge, folded over twice and pinned securely. I tacked it very roughly, removed the pins, and then whip-stitched the fold on the wrong side, so the stitches couldn’t be seen. Once the tacking was taken out, this produced a nice neat edge. I did think about doing a topstitch in a contrasting colour, but it was near impossible to do this by hand, so I gave up.

At this point, I decided to add bamboo handles and an extra decoration, so I cut out some extra pieces and did another yo-yo.
To attach the handles, I cut two strips of green tweed, and then folded them each in half lengthways and sewed the seam. I turned these the right way out, and flattened them out so the seam was at the centre back of each piece. Then I tucked the raw edges in at each end and quickly held them in place with a couple of stitches.
Next, I popped the handle into the centre of each piece, and joined the two open ends together.
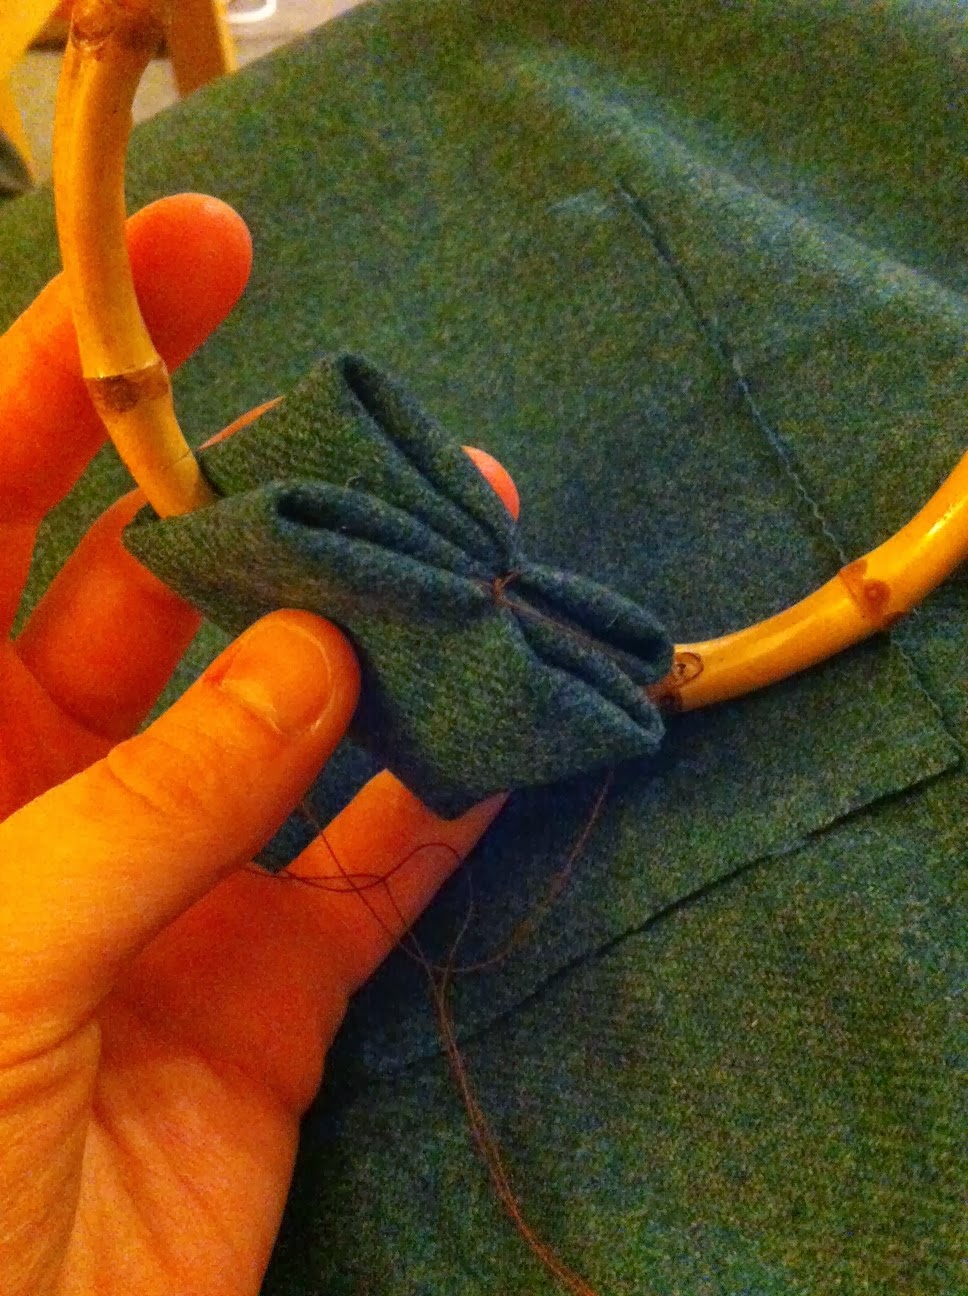
I whip-stitched the handle onto the inside of the bag, sewing it securely all the way round each piece of fabric.
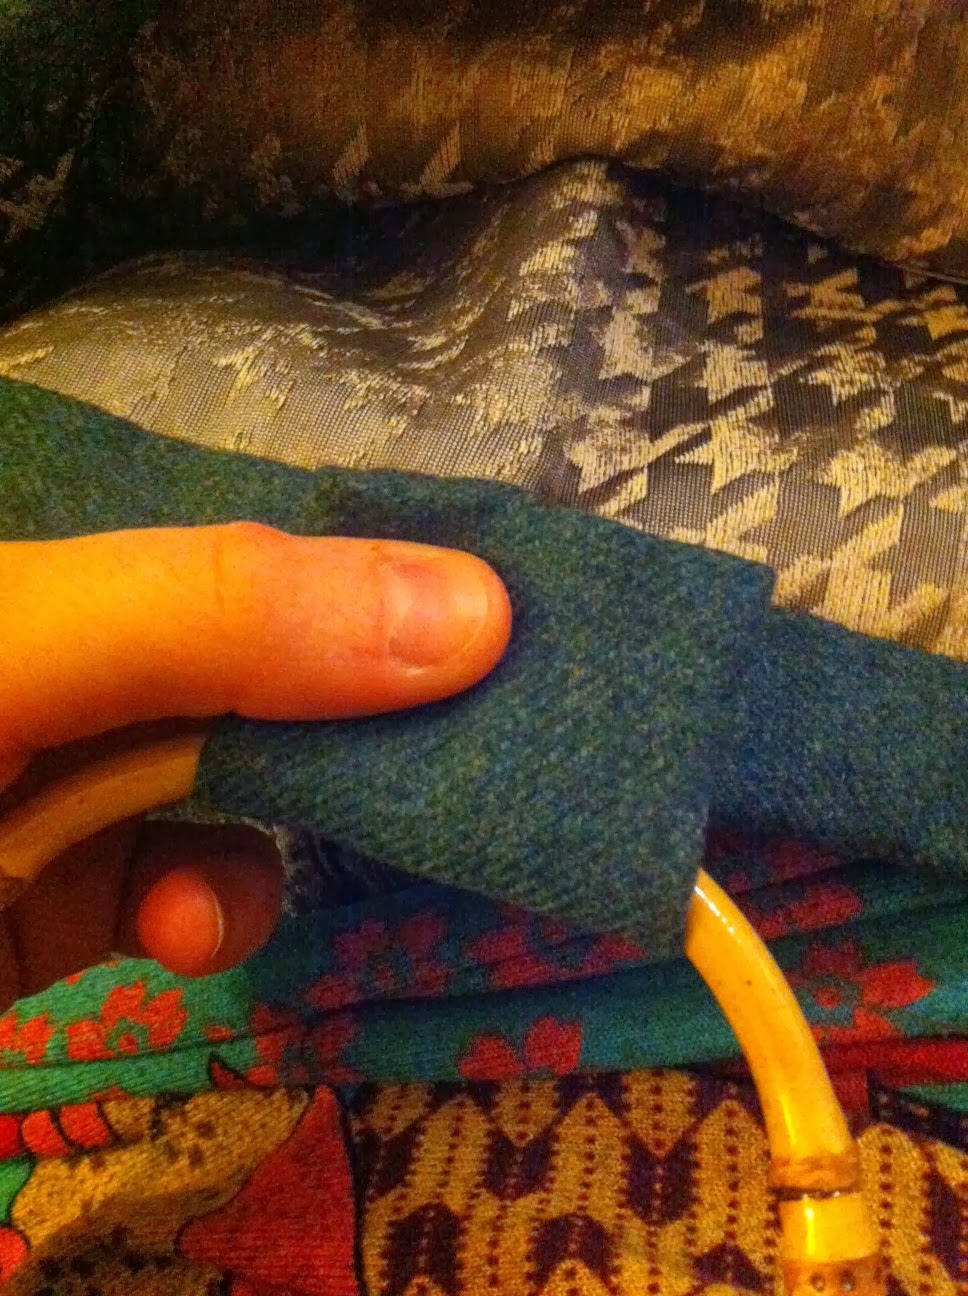
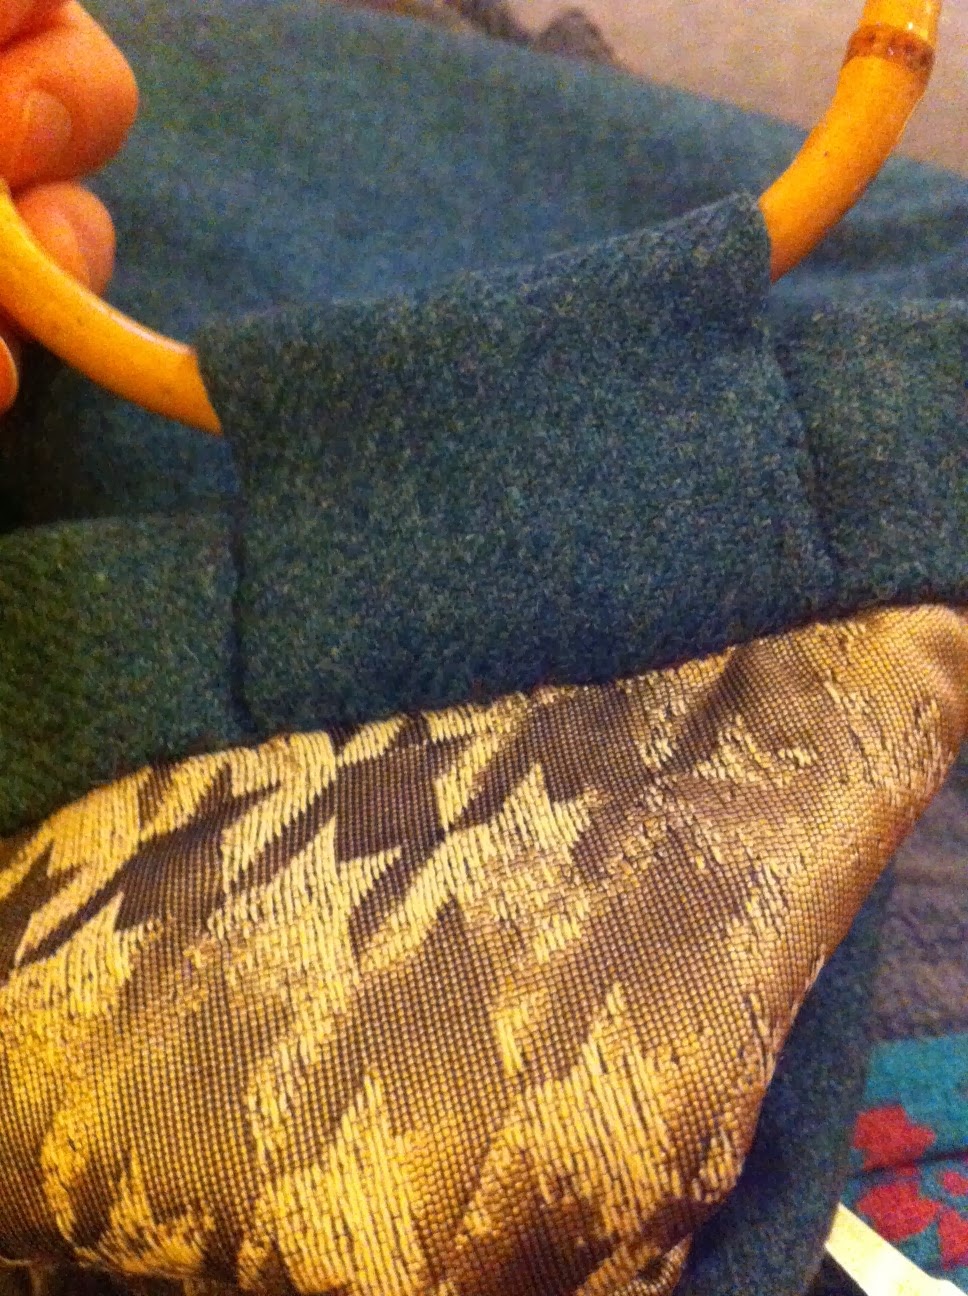
Here’s the finished handle, attached, with no stitches showing.
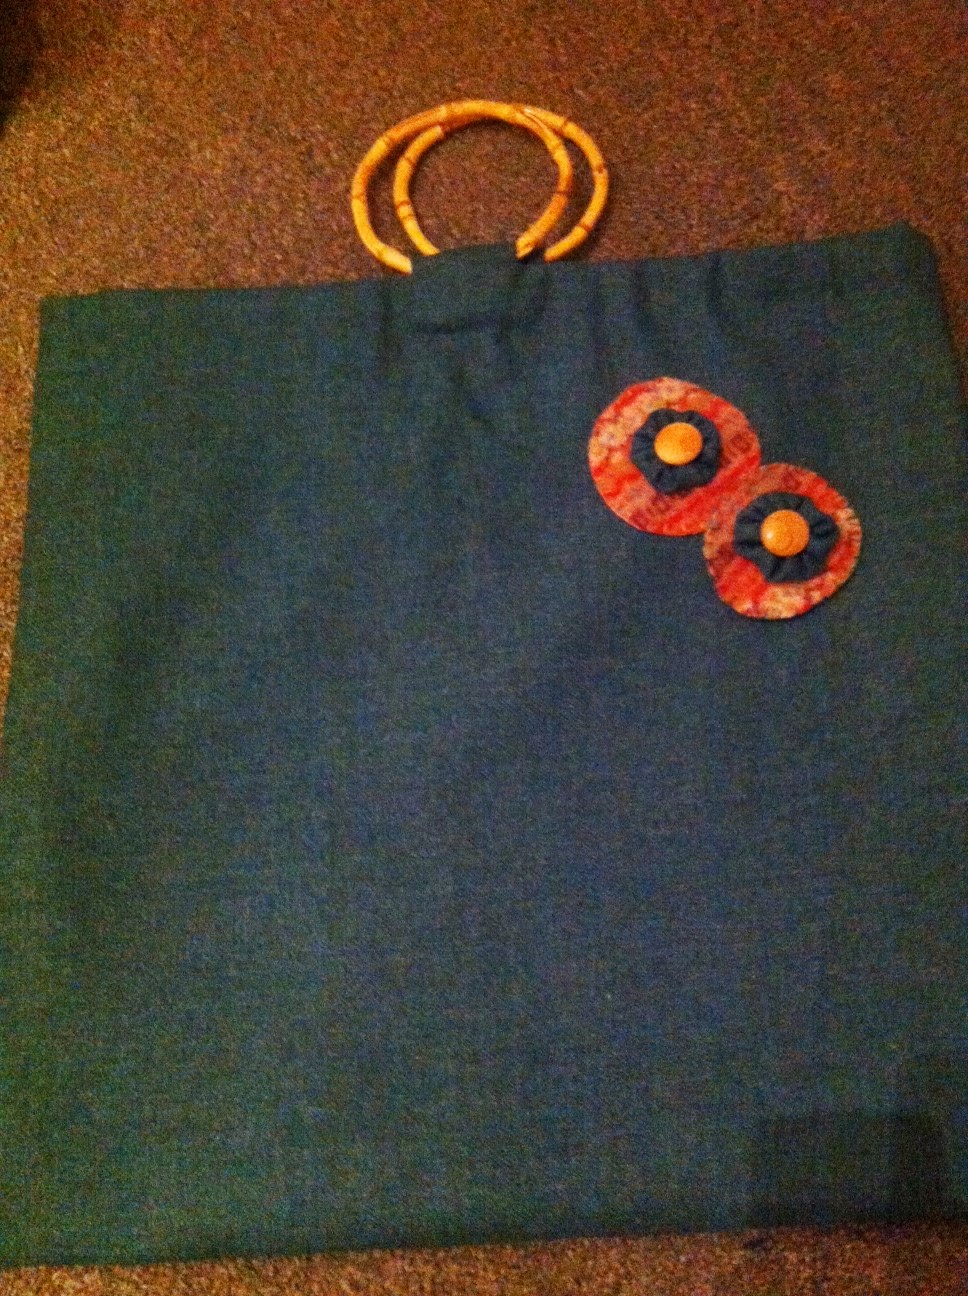
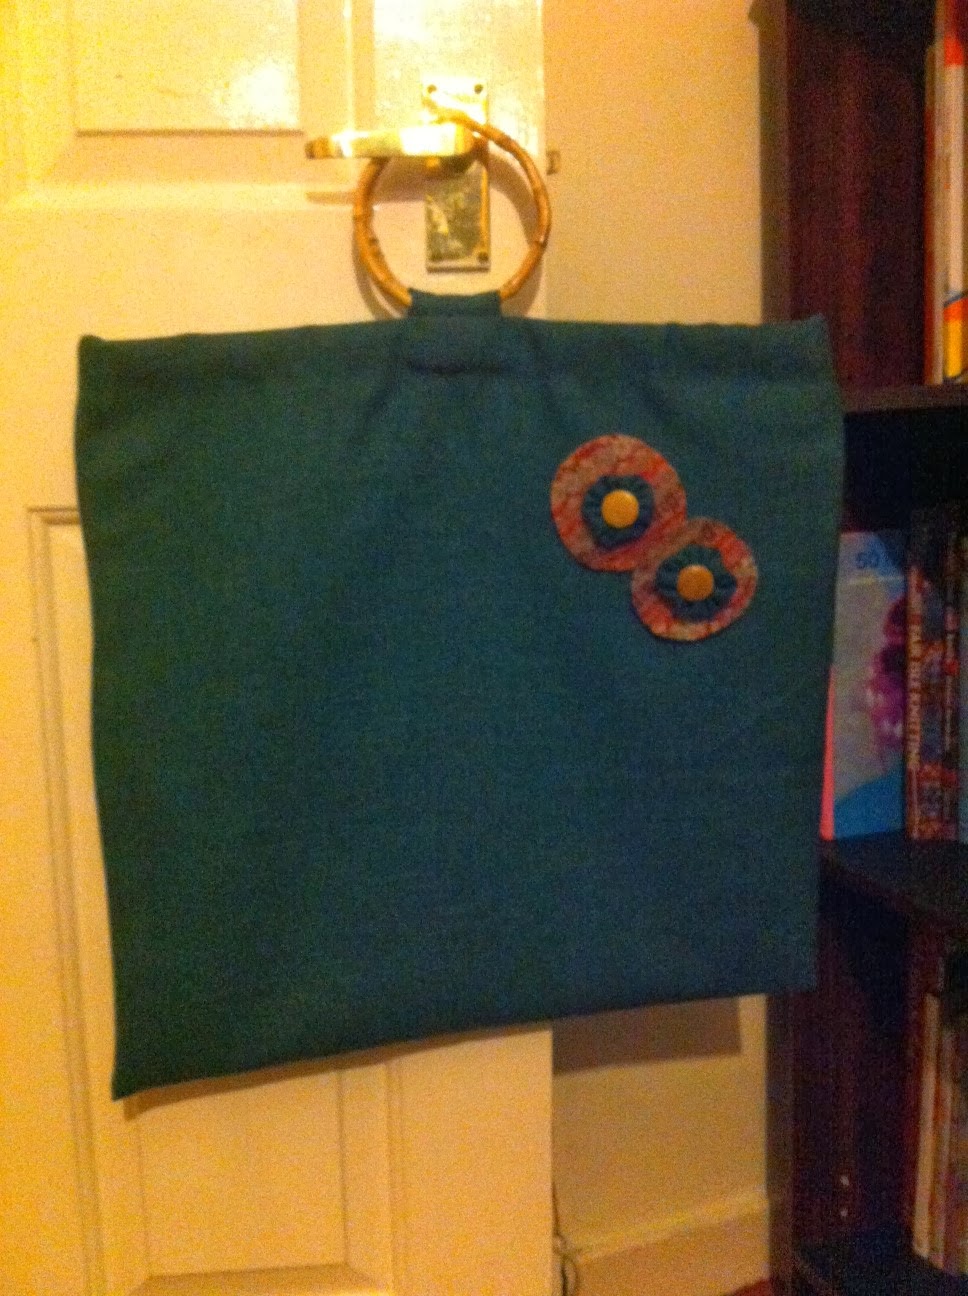
And here’s the bag! This whole process took me about three hours in total, so apologies for the light quality of the last few photos.
The patina fabric worked really well as a lining, far better than I think it would have looked on the outside of the bag.
Lots of space inside – I imagine my mum will probably use this to store things in the house, rather than to take outside, otherwise I’d have added longer cloth handles and turned it into a messenger bag.
Here’s the bag, hanging on a door handle and looking both useful and pretty. The tweed doesn’t really show up properly in these pictures, but it’s a really soft dusky green, very subtle and smart looking.
If I was to make it again, I might have added more decoration, but I didn’t have enough stuff in the house, and I was on a roll and really wanted to finish the project! Thanks to Hillarys Blinds for the fabric sample – I still have some left, so I might make a smaller purse or cushion cover in the future.
